Fork the Core Repository
Create a fork of iCapture v3 in your own GitHub account or organisation. Your fork is your project's repository for custom forms and configuration. The original repository remains the shared iCapture core.
1. Check what you need
- A GitHub account with access to the iCapture v3 repository.
- Permission to create a repository in your chosen account or organisation.
- Git and a code editor for downloading and working with your fork locally.
If Fork is unavailable, ask the iCapture team to check repository access and forking restrictions. Read access alone does not guarantee permission to fork a private repository.
2. Create your project fork
- Open the iCapture v3 repository.
-
Select Fork.

-
Choose your GitHub account or organisation as the Owner.
- Set the Repository name, for example
icapture-v3-community-health. -
Select Create fork.
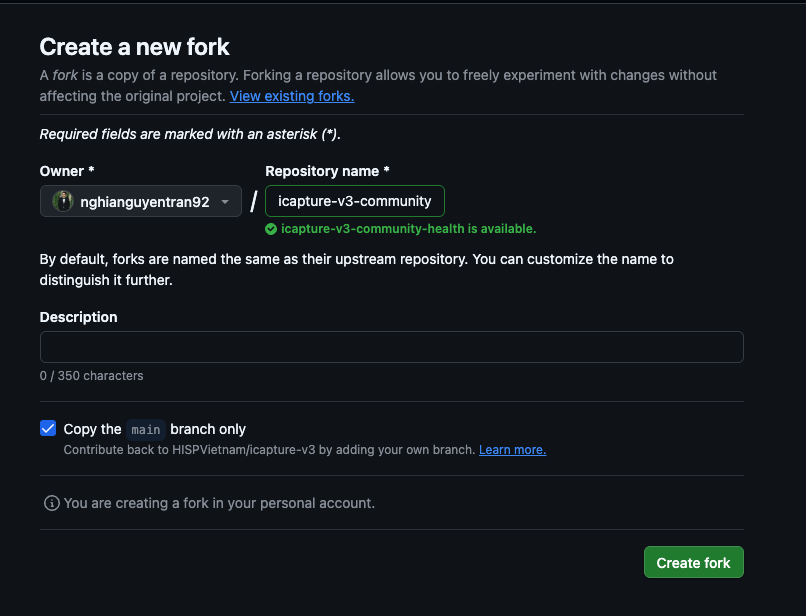
-
Check that the new repository is under your account or organisation and shows that it was forked from
HISPVietnam/icapture-v3.
Keep your project's custom forms and configuration in src/extensions/ inside this fork.
3. Download your fork
On your fork's GitHub page, select Code and copy its HTTPS clone URL. Open a terminal and run:
git clone https://github.com/YOUR_ACCOUNT/icapture-v3-your_project_name.git
cd icapture-v3-your_project_name
Replace YOUR_ACCOUNT and your_project_name with your fork's owner and repository name. Complete GitHub authentication if prompted.
Continue with Start iCapture v3 Locally to configure your DHIS2 connection and run the application.